How to Access Shopify Admin, Partner Dashboard, and Customer Account
Shopify is currently one of the most popular E-commerce platforms. It's a platform that allows both business owners and freelancers to create online stores and help store owners develop their websites. Whatever you want to do on Shopify, you'll need an account, and this article will teach you everything you need to know about Shopify accounts. It will specifically provide you with a detailed guide on how to login to both Shopify Admin, Partner Dashboard, and Customer Account!
Shopify Store Admin Login
What is Shopify Admin?

- Orders, customers, and products are the core of your business activities.
- Online stores, point of sale are ones of the sales channels. There is a handful of others when you click that
+button. - Apps are applications bought from the Shopify app store and installed on your account.
- Settings are features applied to your Shopify store.
How to create a Shopify Account?
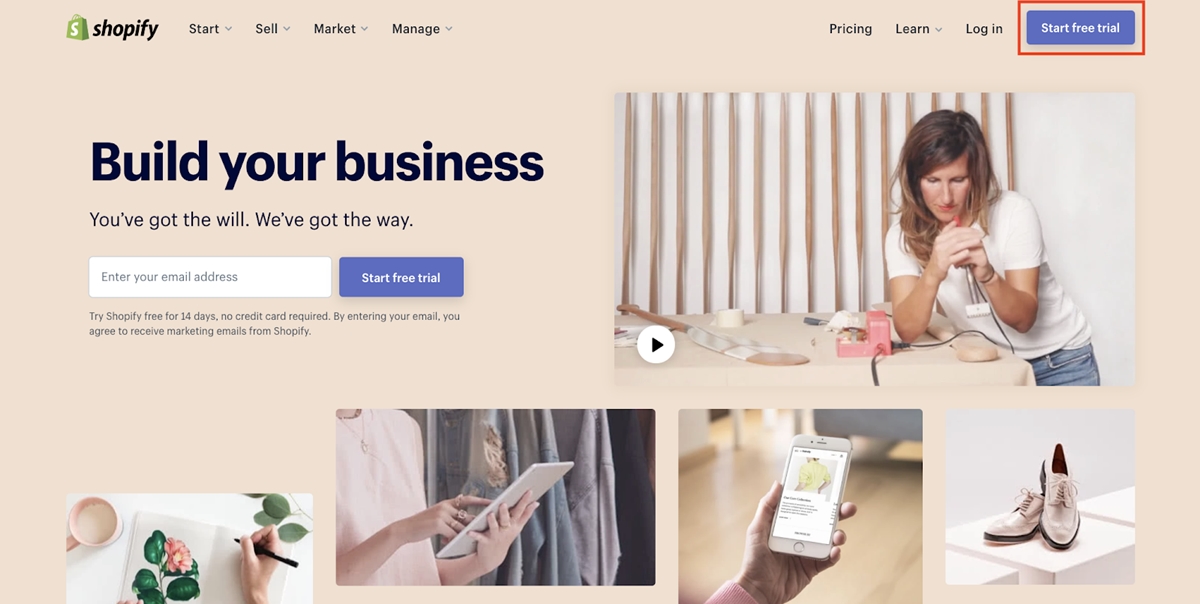
Step 1: Go to Shopify and hit Start free trial. In case you don't know, all new accounts are eligible for a Shopify free trial. This will allows new merchants to try out the platform before committing to a paid plan.
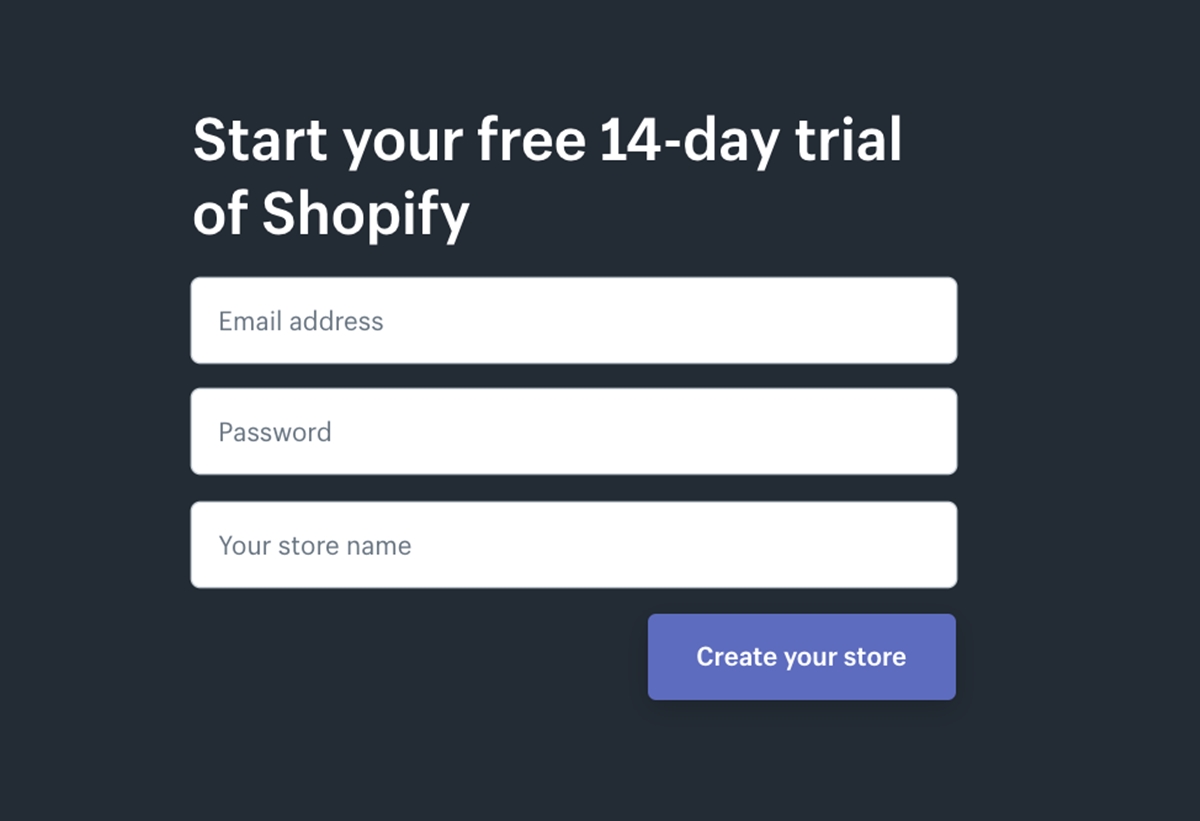
Step 2: Enter your information and hit Create your store.
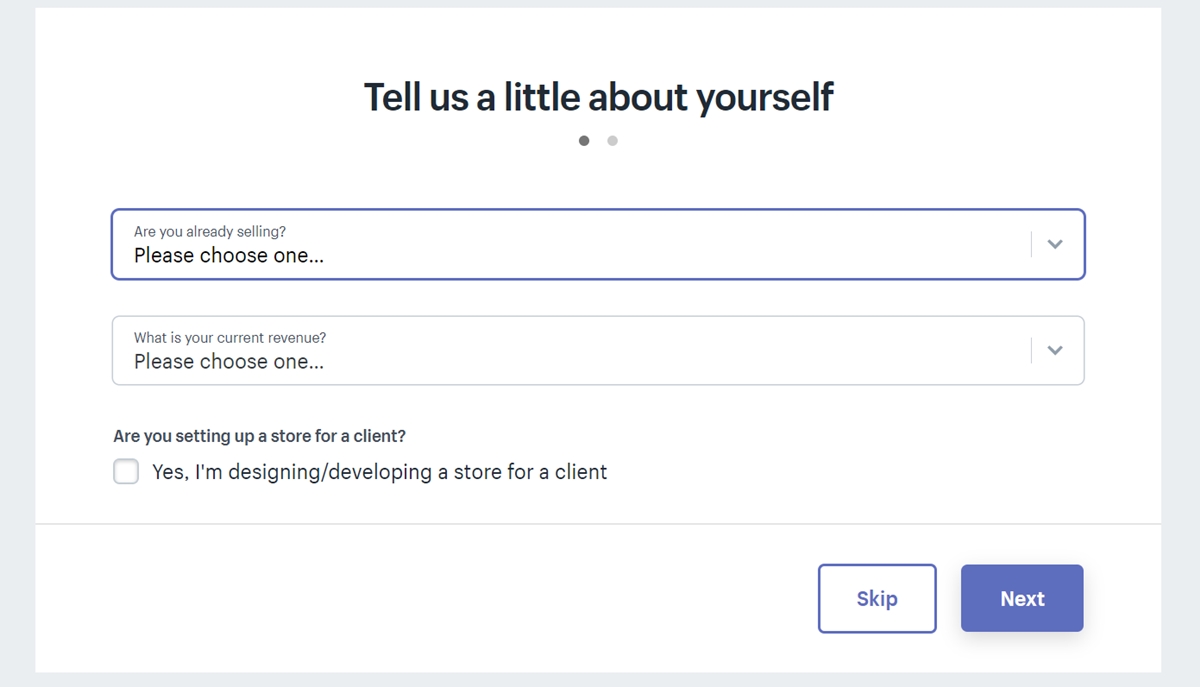
Step 3: Answer some questions from Shopify and you’re good to go.
How to login to Shopify Admin?
Here are 3 steps to Login to Shopify Admin Dashbroad:
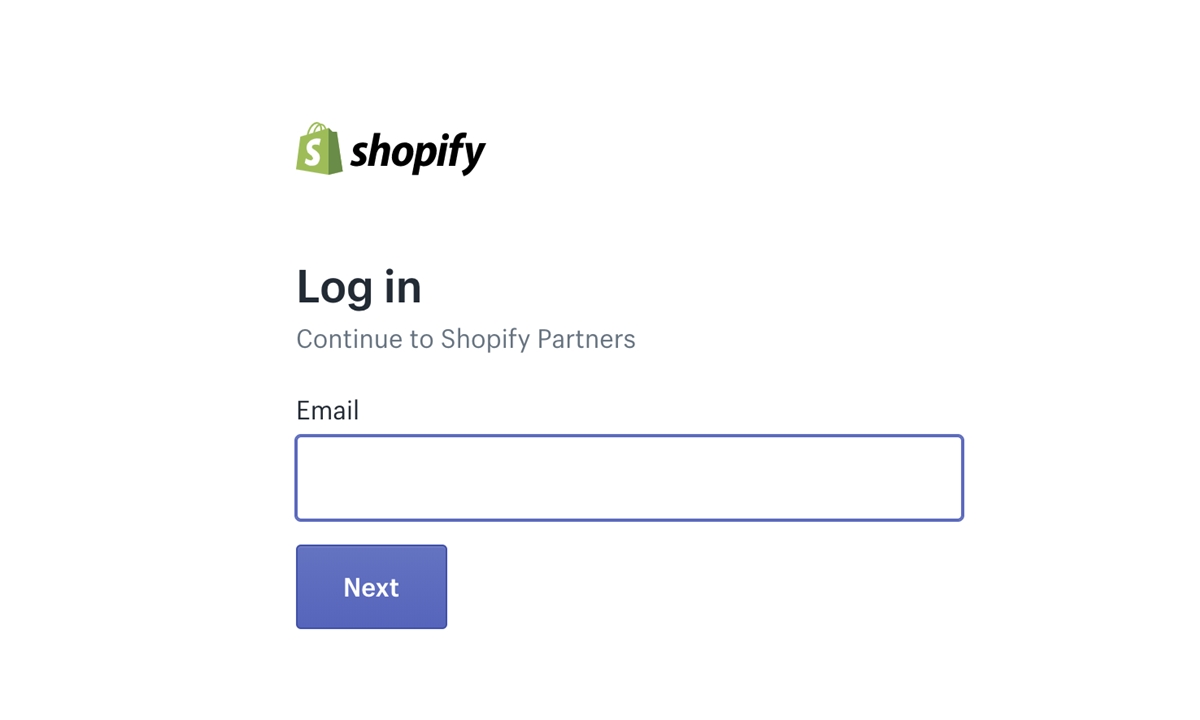
Step 1: When your account is ready, go to Shopify Homepage and click on Log in.
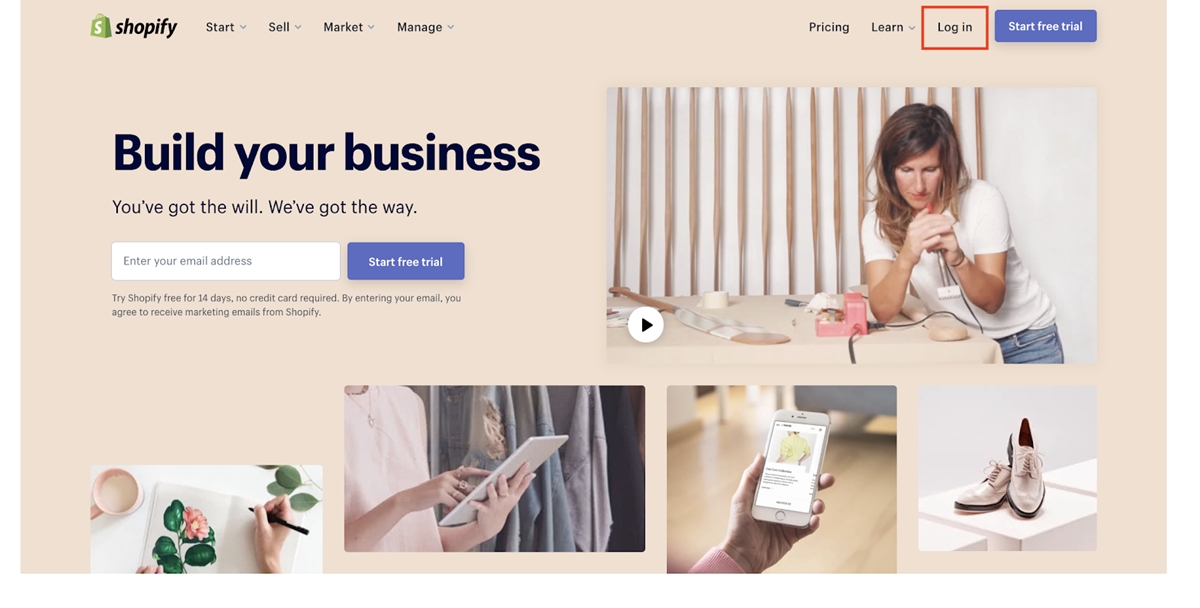
Don’t click on Start free trial as that is for creating a new account.
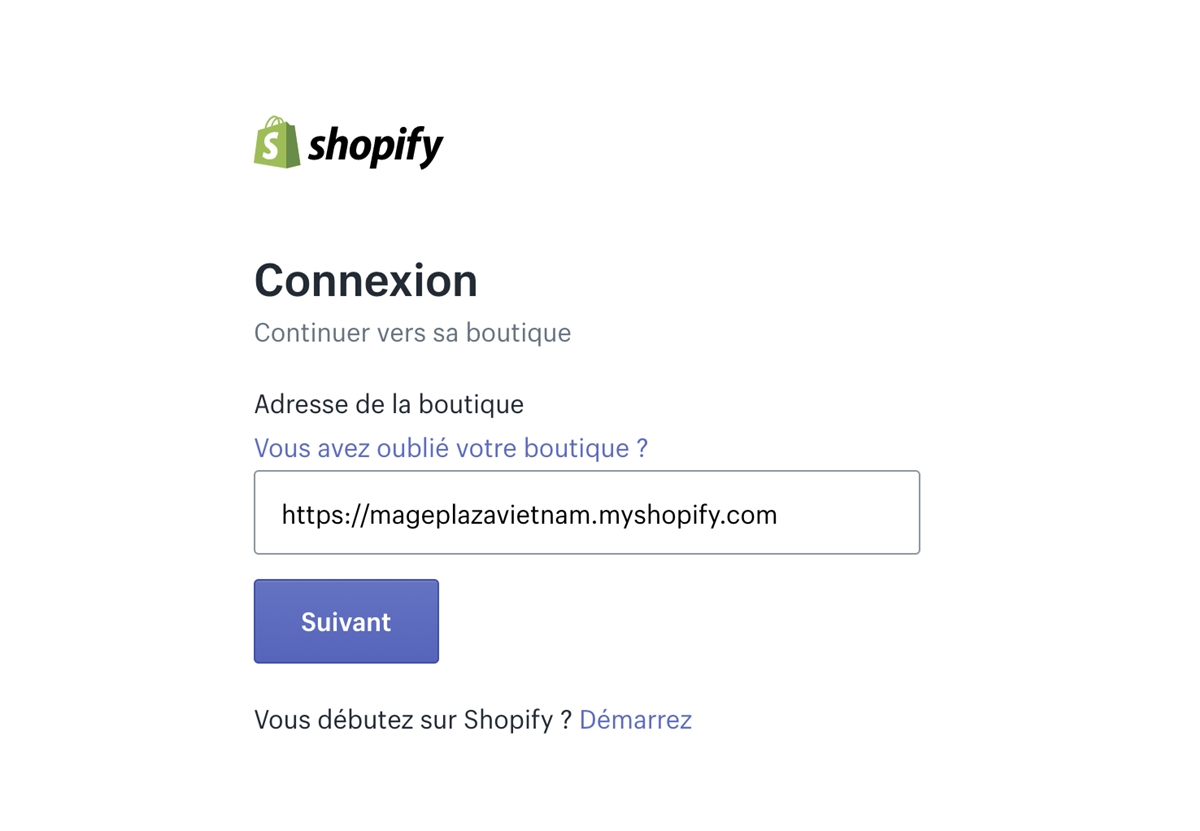
Step 2: Enter your Shopify’s store name on the next page.
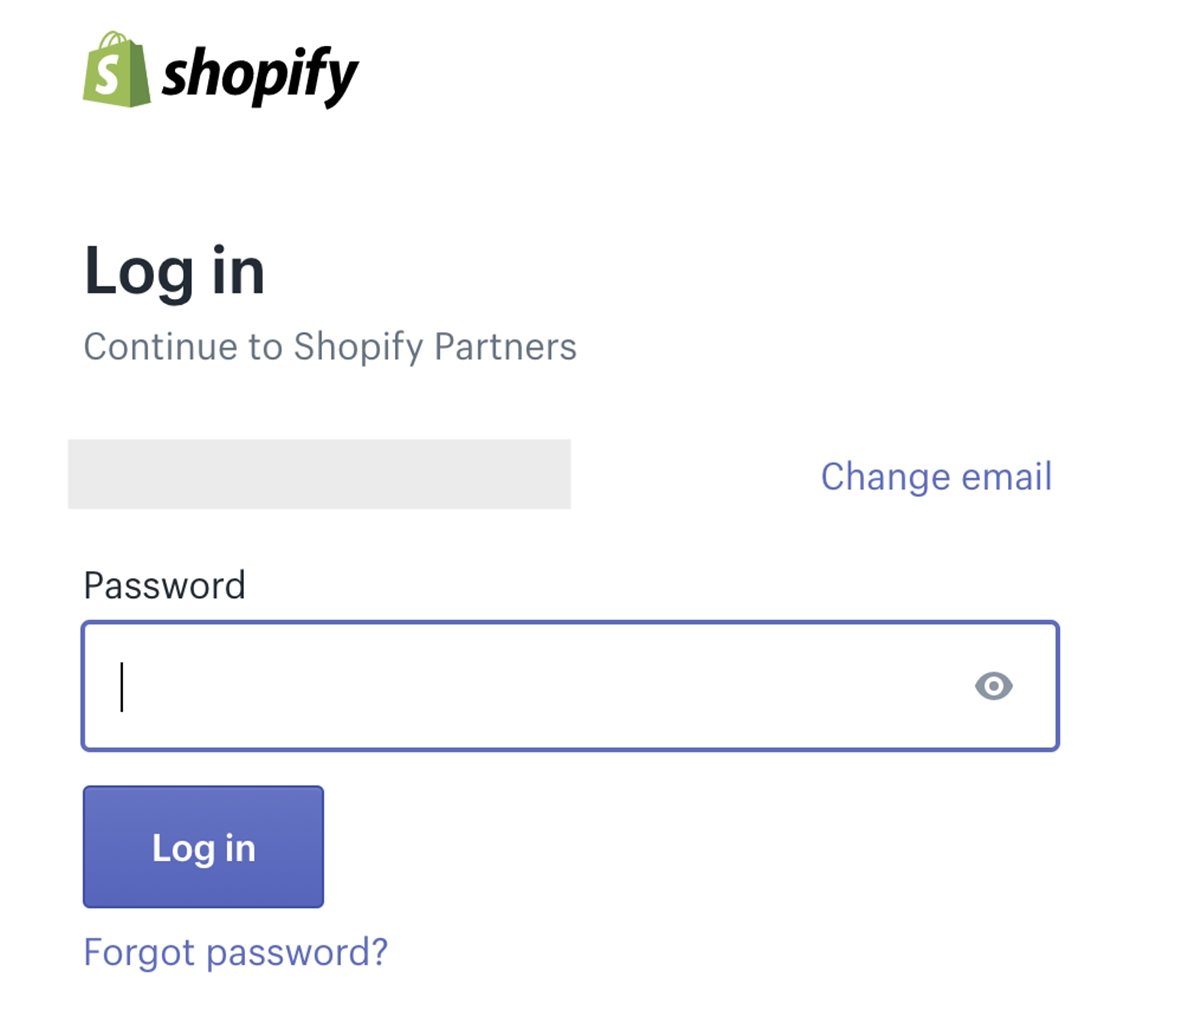
Step 3: Type in your password and click on Log in.
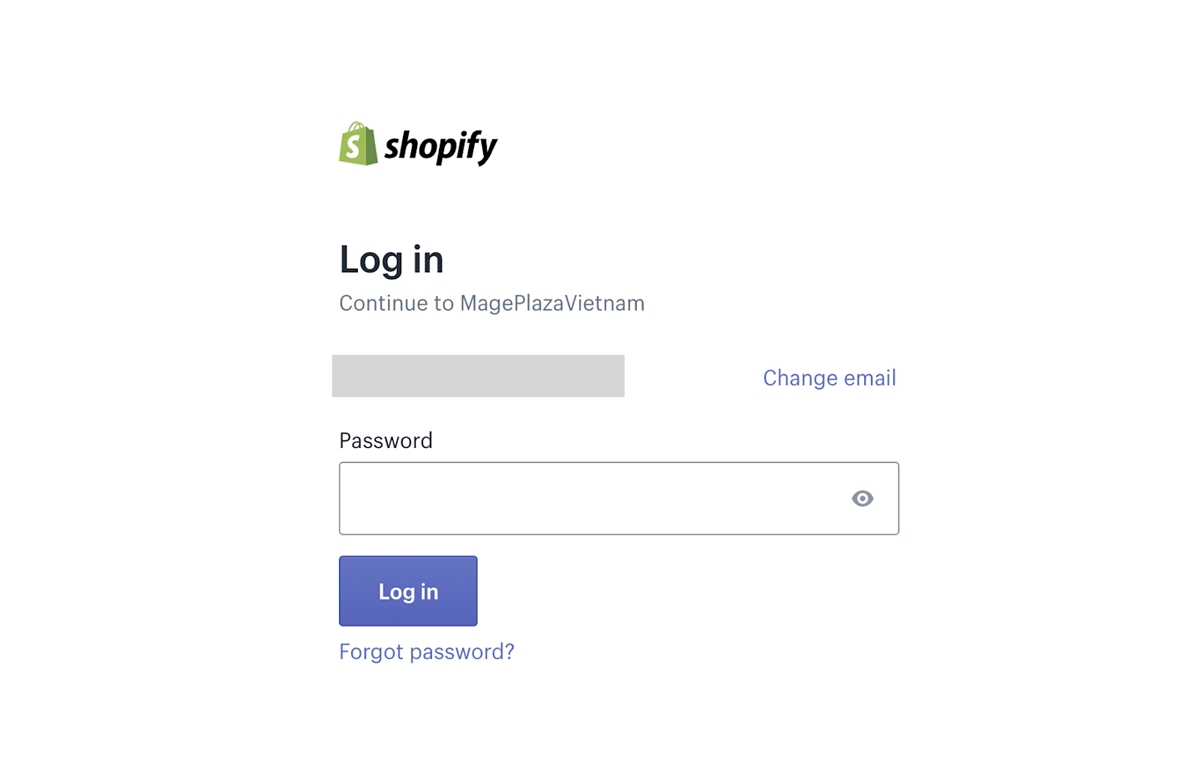
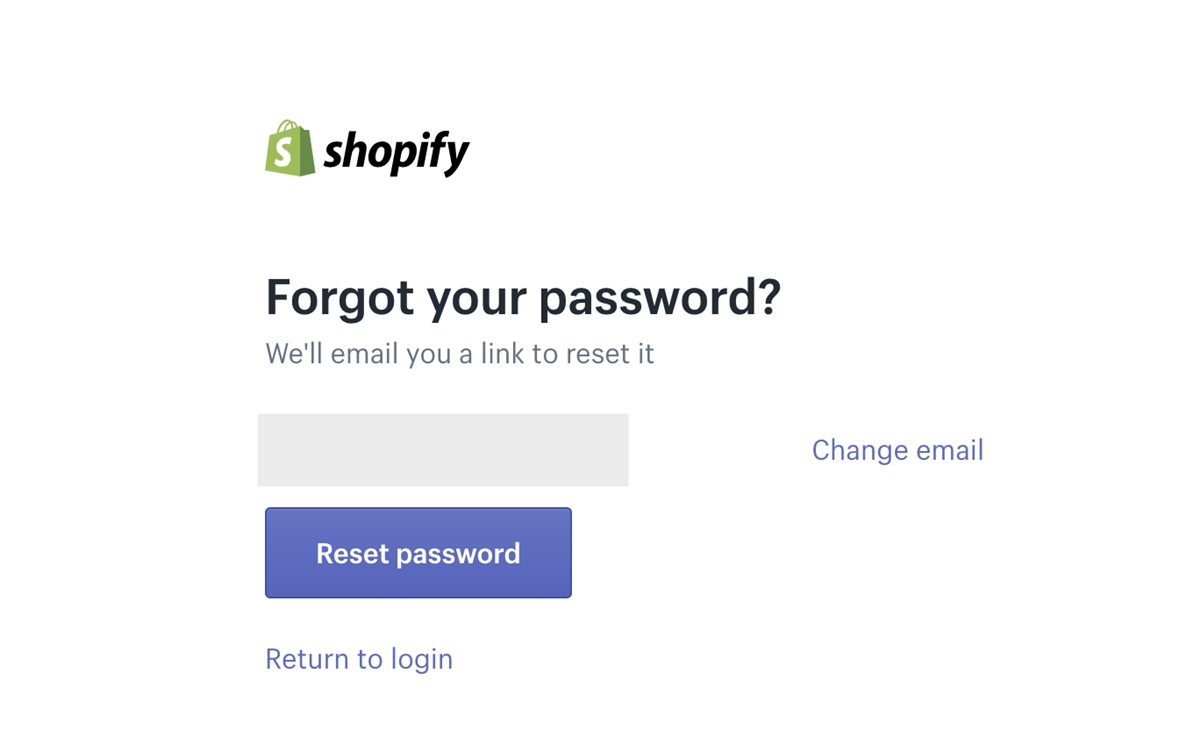
If you forgot your password, you can click on Forgot password.
Once you type in your password and hit Enter, you will be directed to Shopify Admin.
Shopify Partner Login?
What is Shopify Partner?
Shopify launched this program in 2016 to attract people with specific types of expertise (design, marketing, and programming) to collaborate with Shopify and earn incentives. Anyone can sign up as a basic Shopify partner and earn money by referring new customers to the platform.
Most people, on the other hand, want to become Shopify experts. Anyone seeking this title must have a track record of successfully setting up Shopify stores. Shopify requires at least five examples of Shopify stores that the individual has assisted in the creation of. When someone qualifies, they are given the title "Shopify expert" and their profile is added to the Shopify Experts website. There, the individual will be ranked based on their client success.

Shopify offers a list of categories which individuals or companies can join as Shopify experts including:
- Marketing and Sales
- Store Set-up
- Store Development and Troubleshooting
- Visual Content and Branding
- Content writing
- Expert Guidance

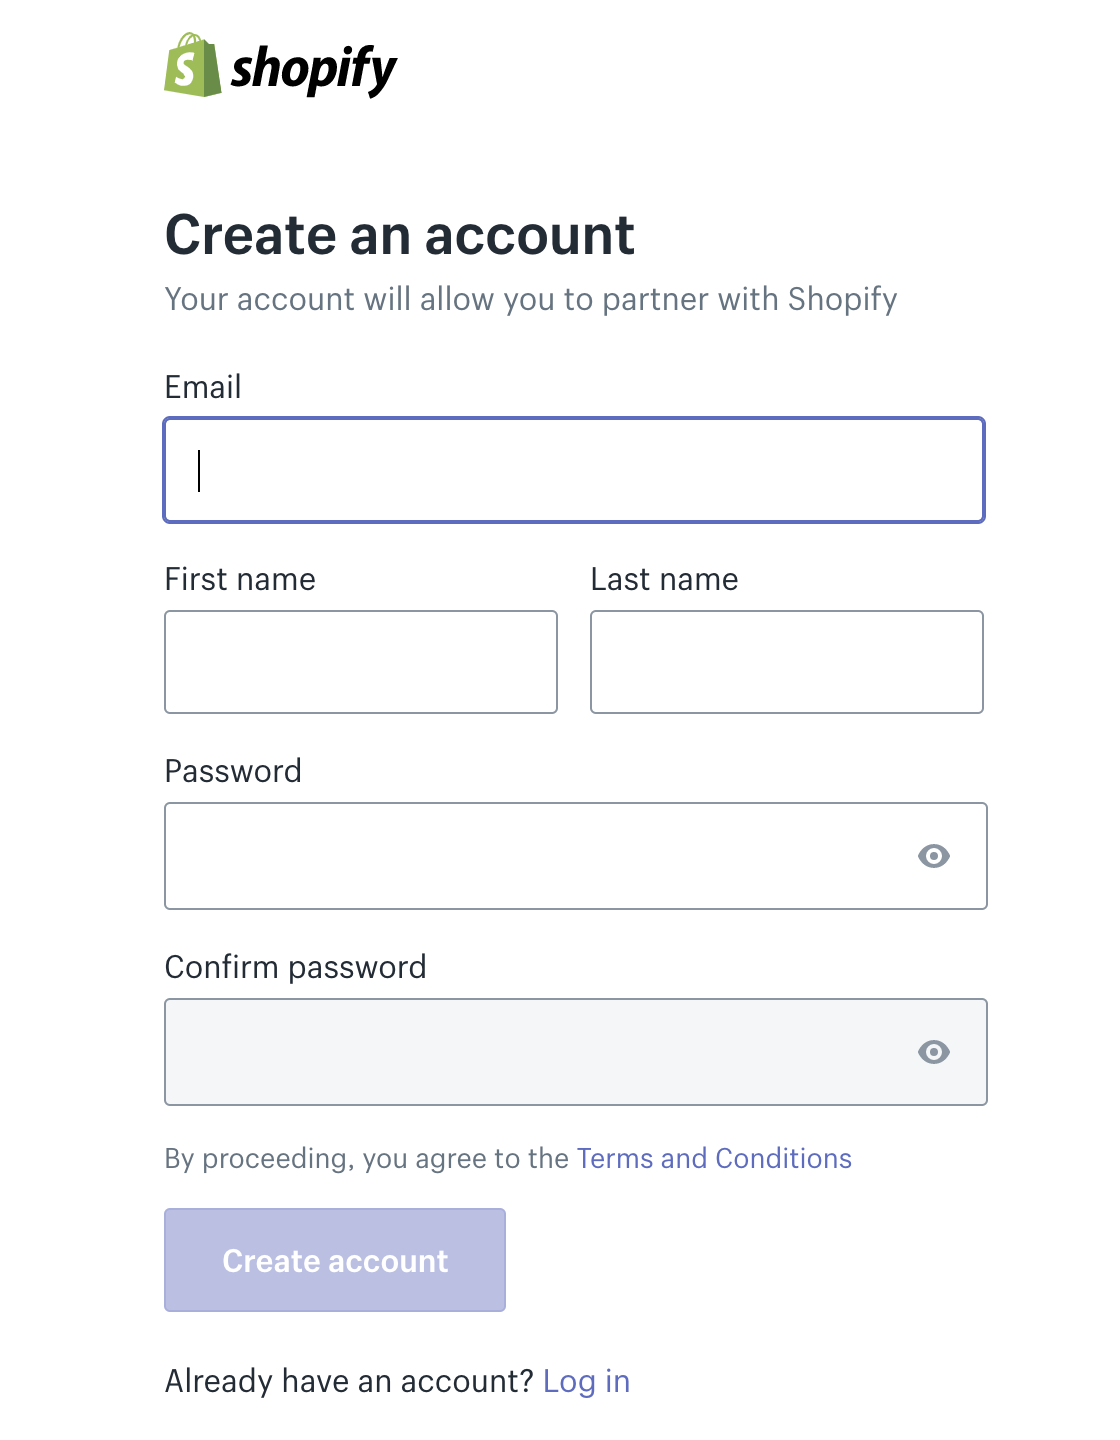
Create a Partner Account on Shopify?
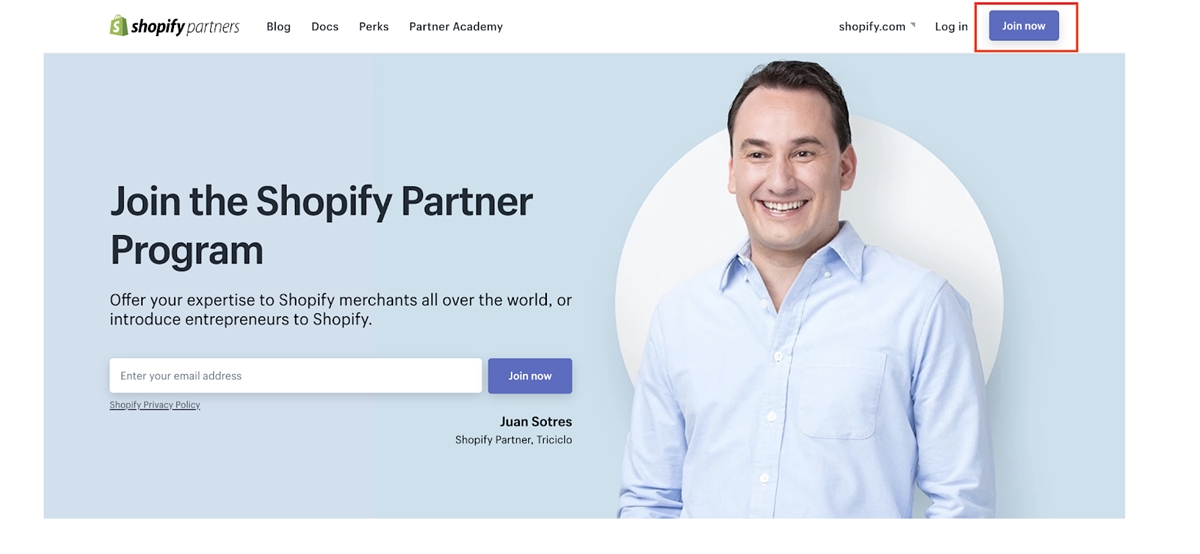
Step 1: Go to Shopify partner page and click on Join now.
Step 2: Enter your information and Hit Create account.
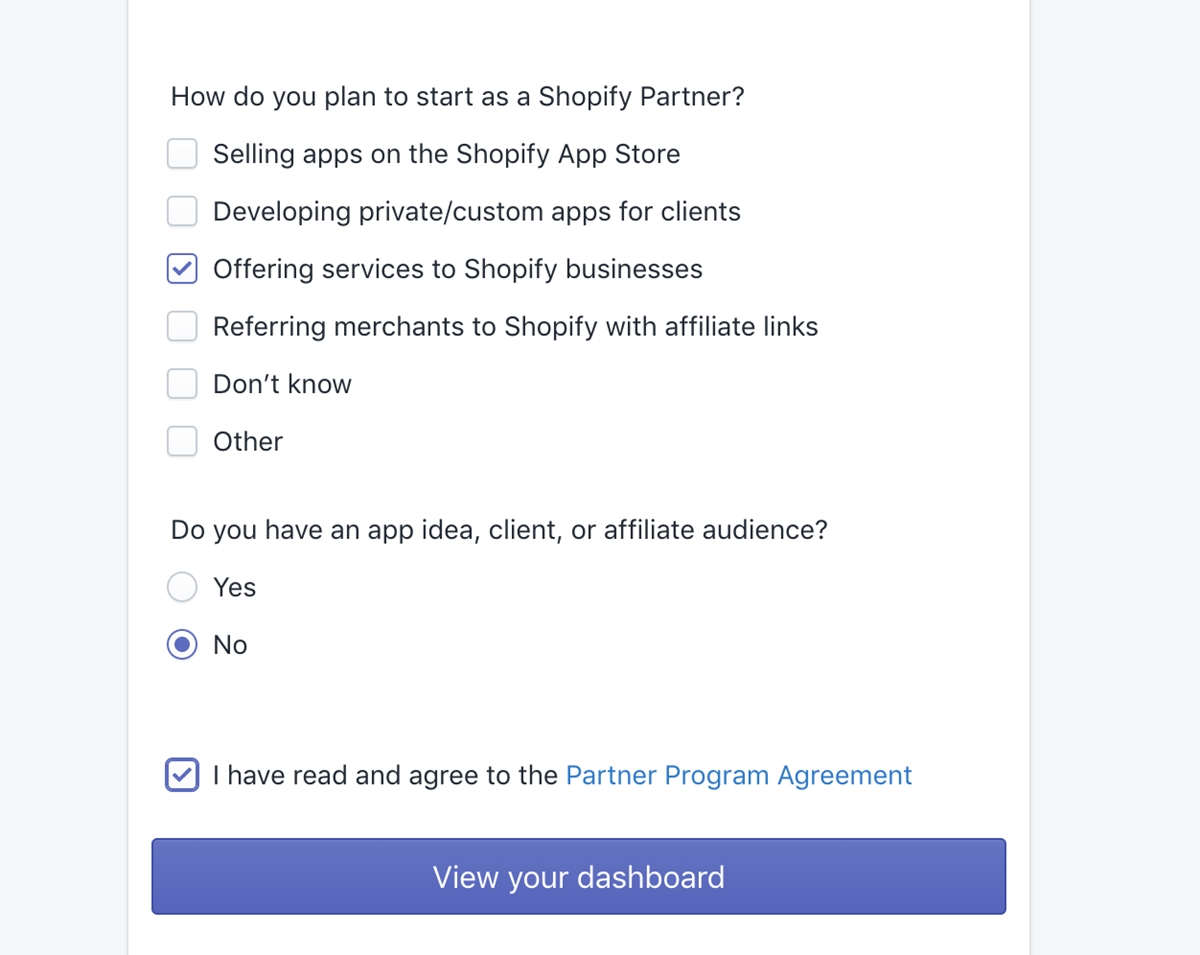
Step 3: You will be directed to a page where there is a form to fill out; finish it and hit View your dashboard and you will get to your dashboard.
How to Login to Shopify Partner Dashbroad?
Here are 3 steps to Login to Shopify Partner Dashbroad:
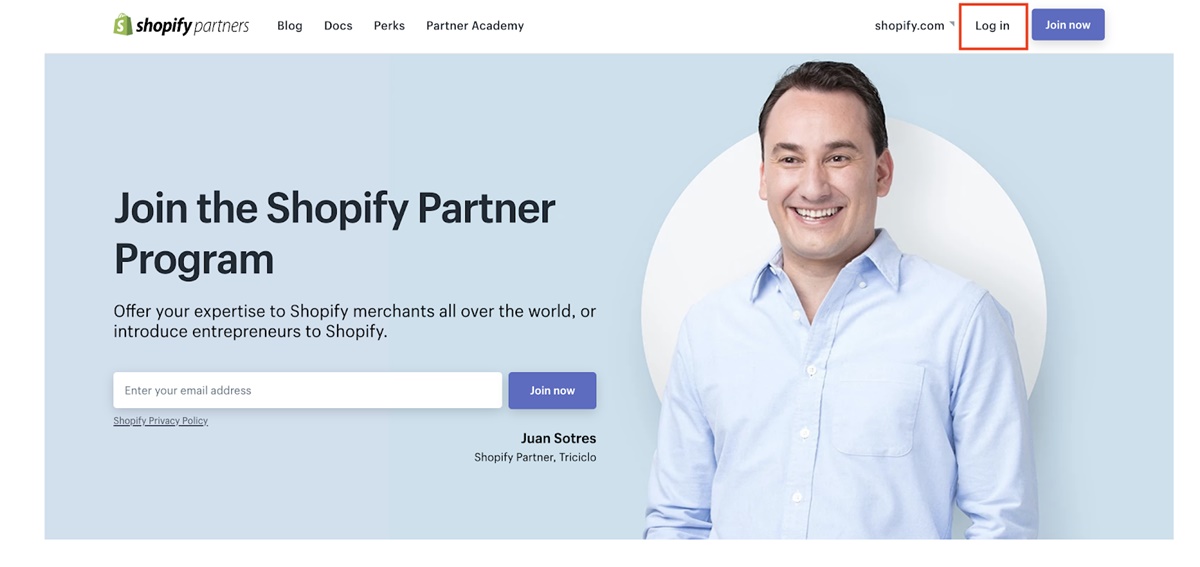
Step 1: Go to Shopify Partner site and click on Log in.
Step 2: Enter your email.
Step 3: Enter your password. If you forgot it, hit Forgot password.
There you go!
Shopify Customers Login?
Customer account, what is it?
When you allow customers to create personal accounts, you will save their information in your database, including their identity (name, phone number, email), order history, and current order status. When a customer logs in, their information such as name, email, and address will be pre-filled from your data during the checkout process.
Set your customer account preferences?
To edit your customer account settings, go to Settings -> Checkout in your Shopify Admin.
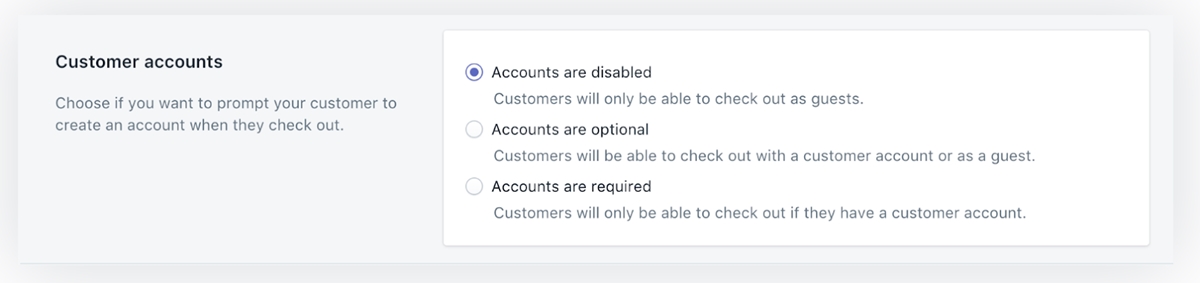
- Accounts are disabled: There won’t be an option for customers to create an account or log in during checkout. They will have to enter their information manually at checkout as fields won’t be pre-filled.
- Accounts are optional: It’s not mandatory to have an account to check out, but customers can still create an account. Their information will be pre-filled if they have an account and are logged in during checkout.
- Accounts are required: It’s mandatory to check out with an account, which means customers have to create one and are logged in to complete their checkout. This setting is helpful if you’re running a wholesale or members-only store.
Click Save to finish your customer account settings.
Invite customers to create accounts?
Check the contact information on the customer's page to see if they have created an account. Account creation invitations can be sent individually or in bulk.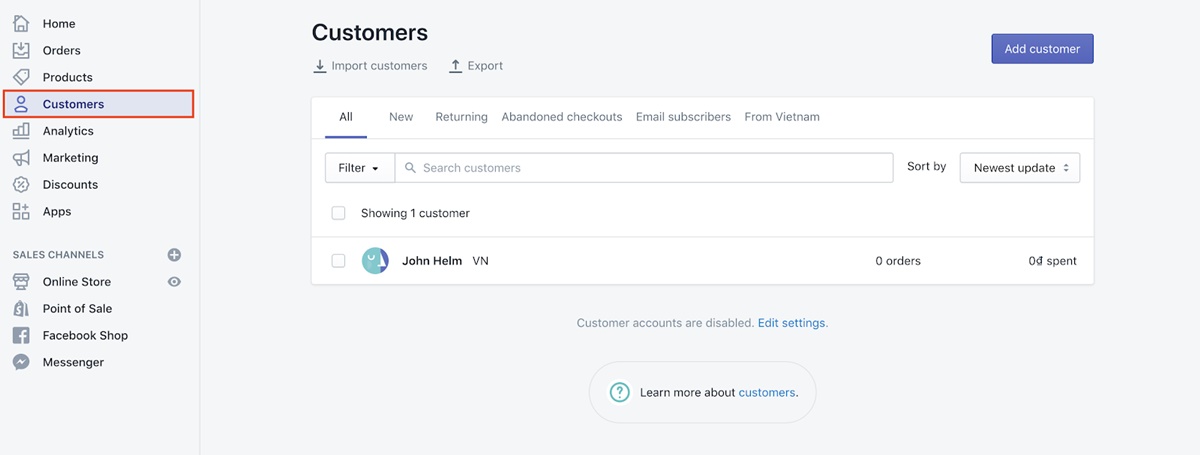
How To Send Invitations Individually
Step 1: Go to your Shopify Admin, click Customers.
Step 2: Choose the customer that you want to invite; if the customer who you want to invite is not listed, you will need to add them first.

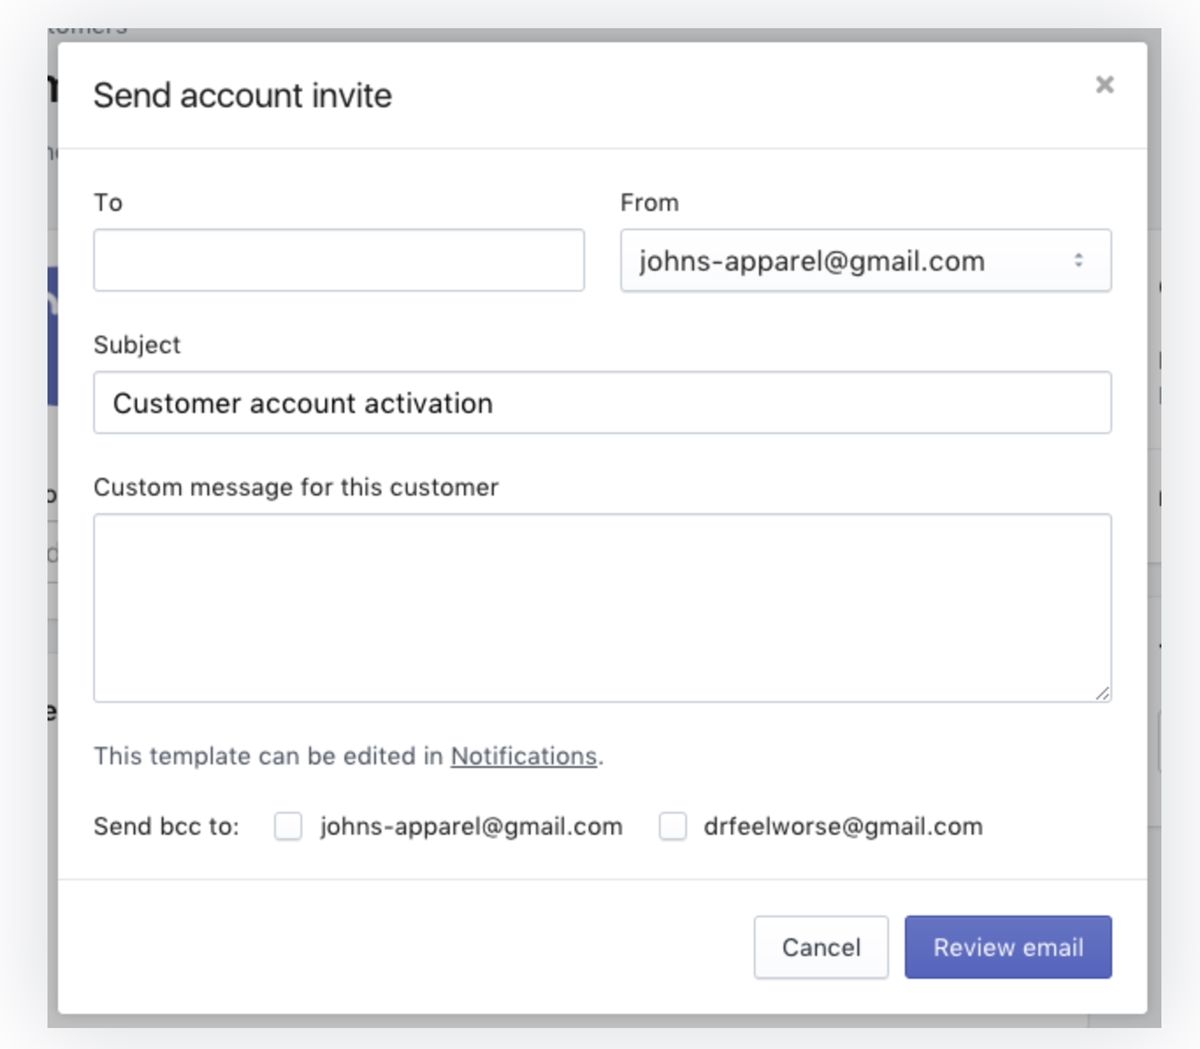
Step 3: Click their email address and a pop-up will appear, you need to fill out the information.
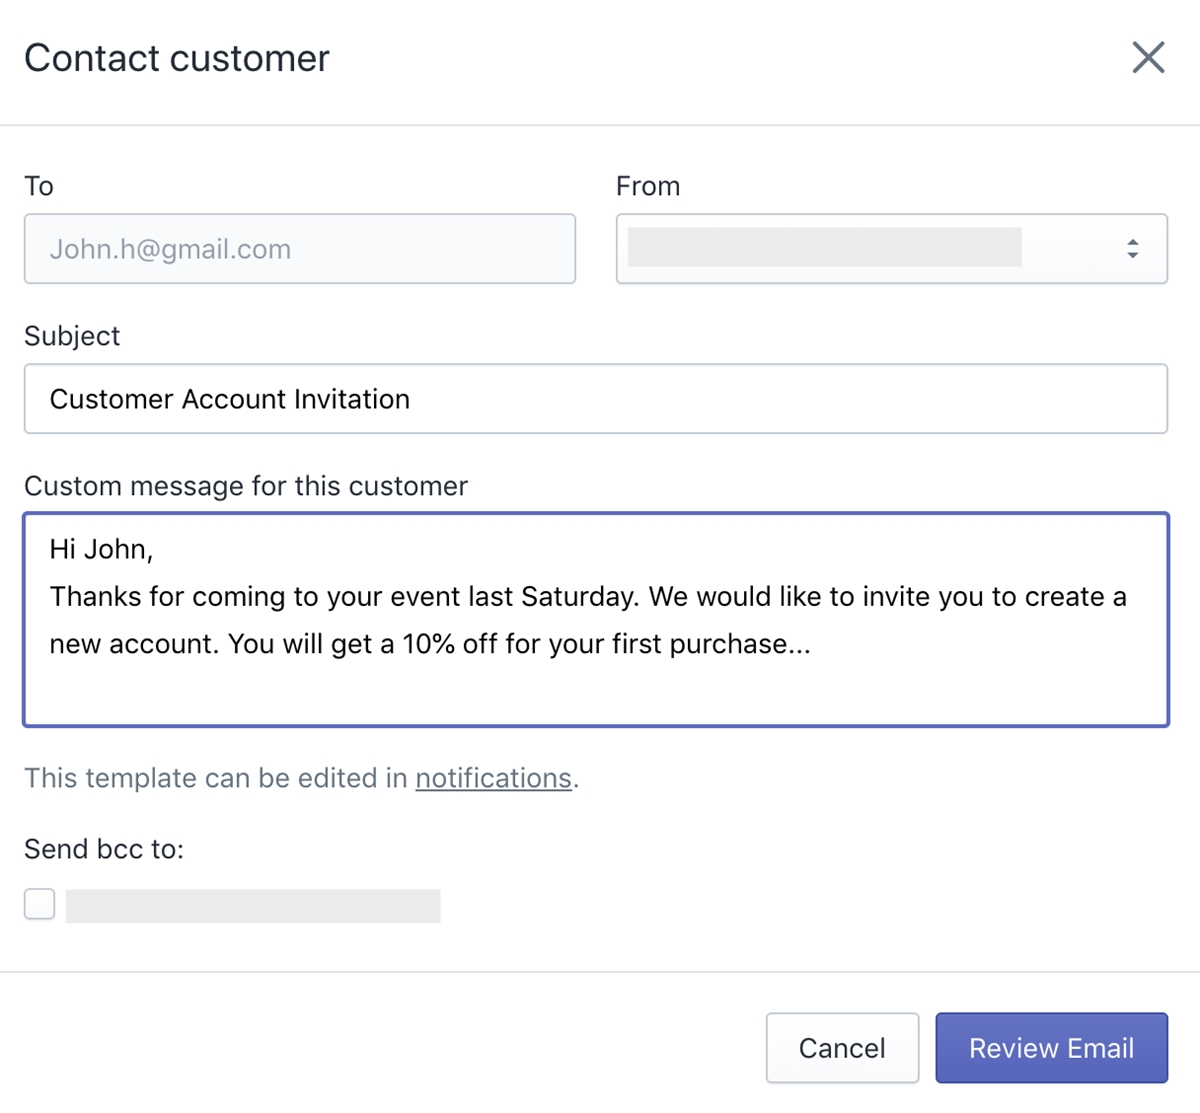
You can make changes by:
- Choosing who sends the invitation with the From drop-down.
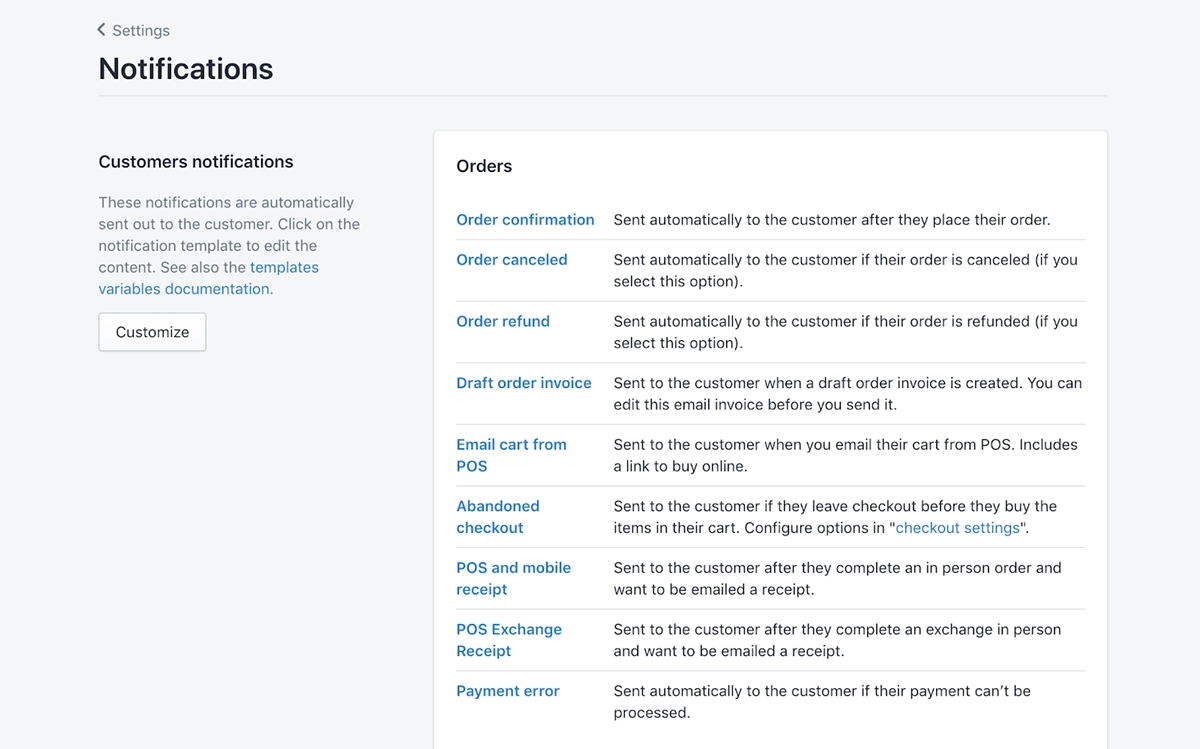
- Editing the default template of your invitation email by hitting the Notifications link below the Custom Message area.
Step 4: Click Review Email.
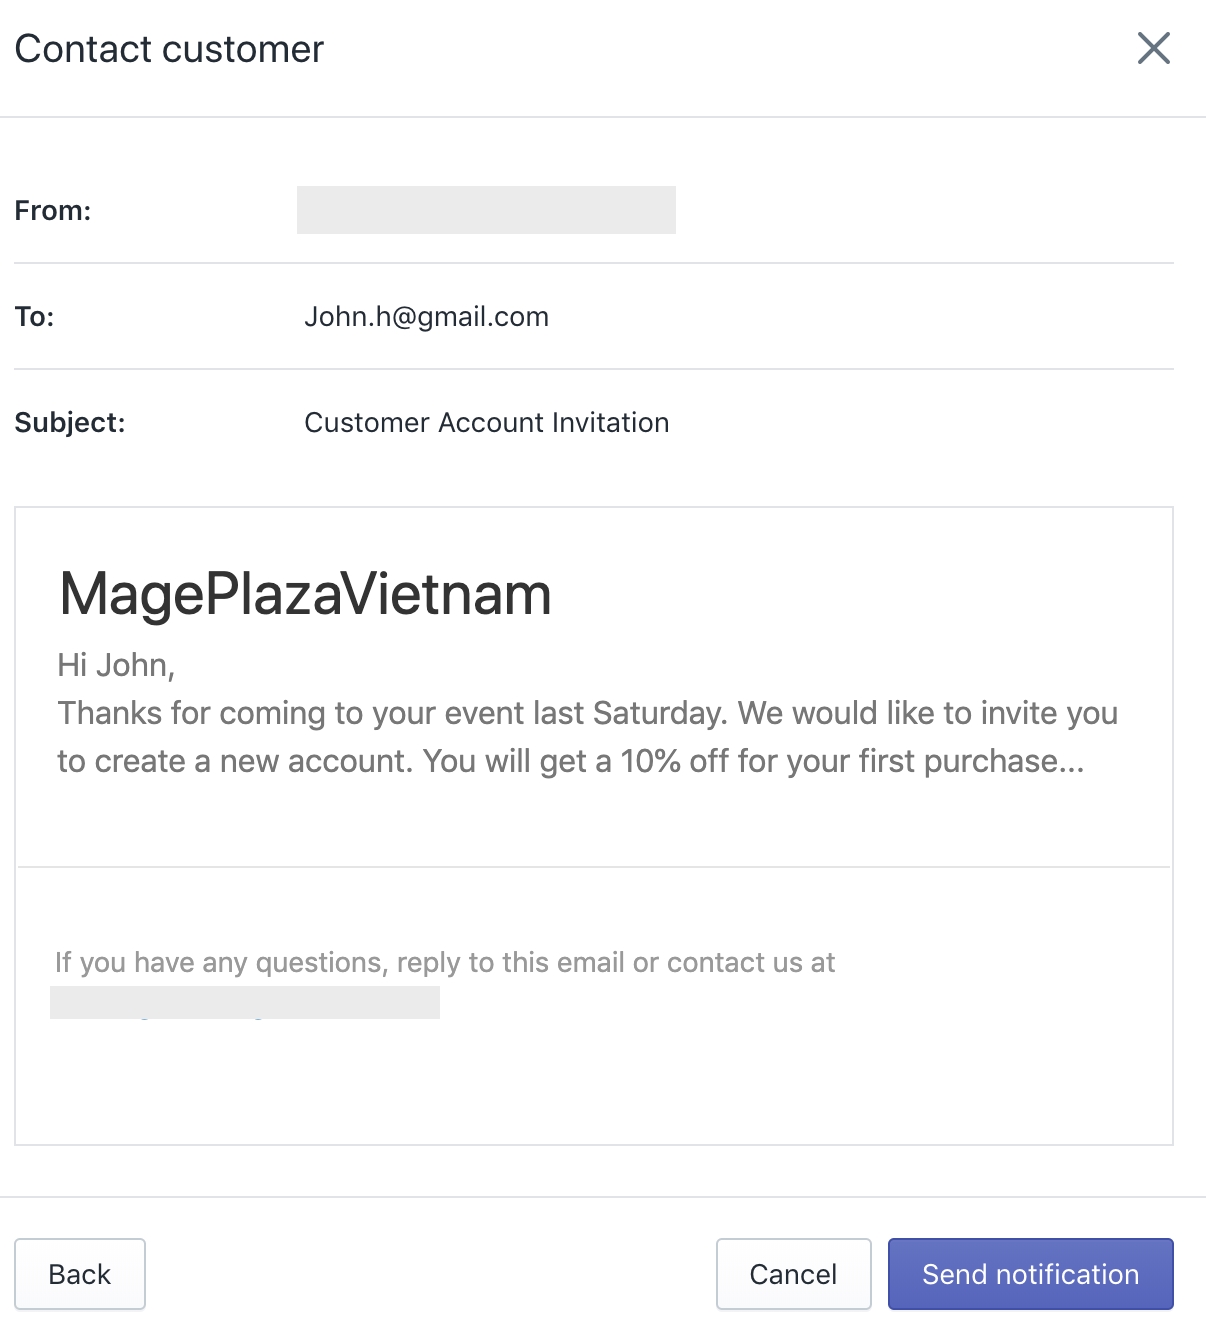
Step 5: If everything is ok, click Send Notification.
How To Send Invitations In Bulk
How to reset customers’ passwords:
If a customer forgets their password, you can reset it for them.
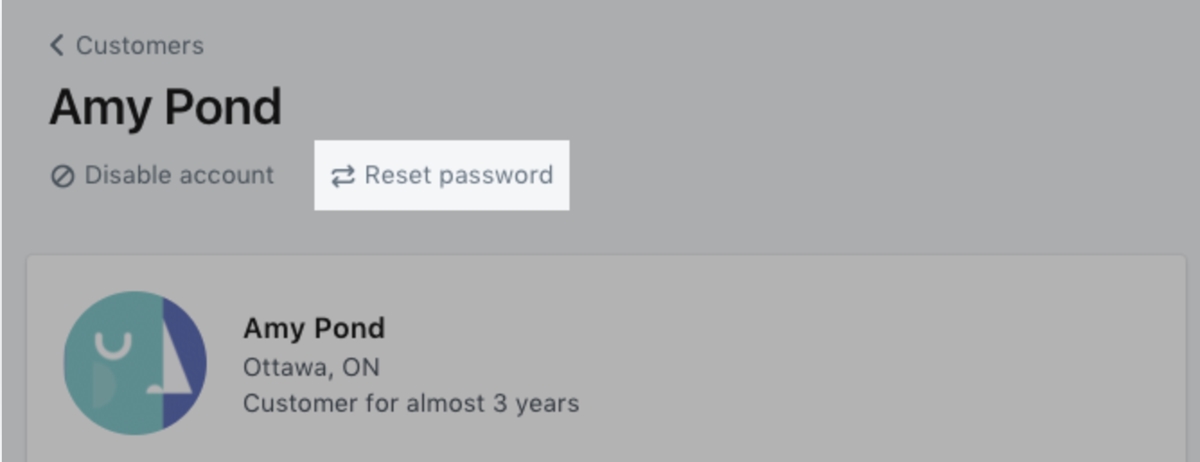
Step 1: Go to Customers in your Shopify Admin
Step 2: Click the customer you want to edit
Step 3: Click Reset Password
Step 4: Click Reset password again in the next dialog.
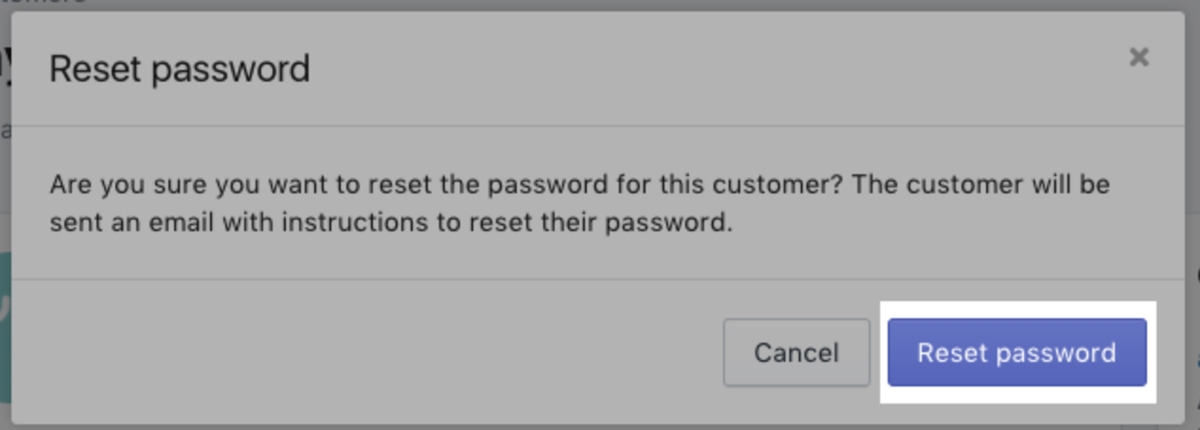
After that, an email will be sent to the customer with instructions showing them how to reset their password.
How to disable a customer’s account:
If an account is required to place an order (your preference mentioned in section 3.1), you can disable an account to prevent that customer from placing an order with you.
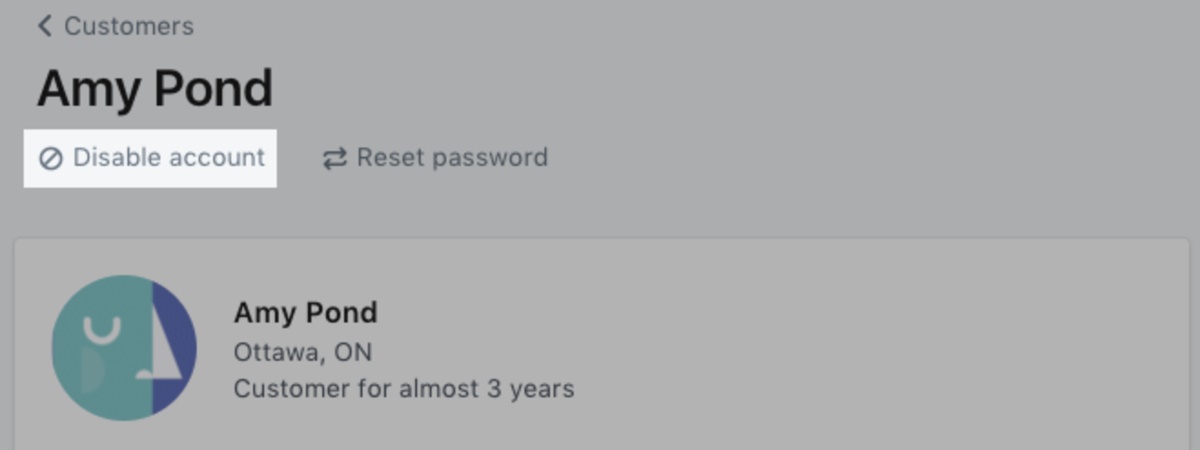
Step 1: Go to Customers in your Shopify Admin
Step 2: Click the customer whose account you want to disable
Step 3: Click Disable Account


Comments
Post a Comment