Shopify Packing Slip: Essential Information
As the digital world grows in popularity, Shopify allows you to make online purchases, receive your receipt via email, and view your entire purchase history. Therefore, in order to run your online business more efficiently, it is essential to fulfill orders quickly and accurately. As a result, the Packing Slip was created as a customizable sheet that indicates what and how many items are included in a shipment to help convey to the customer what has been sent.
Despite the fact that consumers and merchants today pay less attention to the Packing Slip on Shopify, I believe it is still an integral part of the packing process for many eCommerce shipping operations. So, I've written this article to provide you with all the information you need about Packing Slip, how to use it, and its function in your Shopify eCommerce store.
What is Shopify Packing Slip?
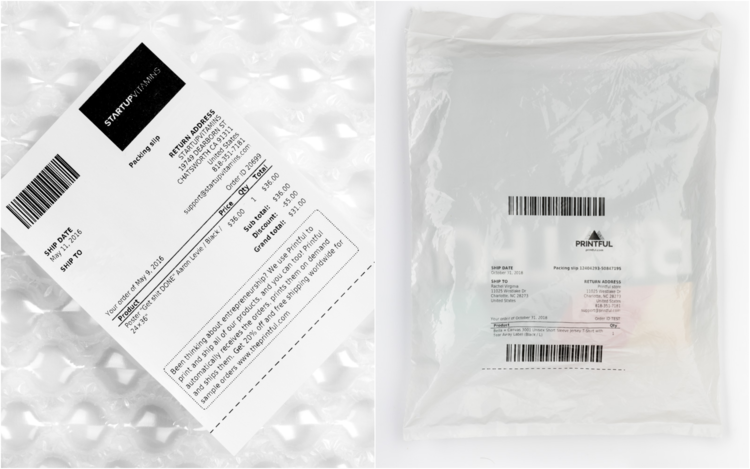
A packing slip is typically printed in two sizes on Shopify: 4x6 and 8x11. It can be personalized with your store's name, logo, and additional customer notes. In addition, Shopify indicates that they will add more features to Packing Slip, such as multiple template support and bulk printing, in the coming days.
Why is Packing Slip Important?
Make sure the shipment has everything
Track all items in the order
Identify damaged items
Confirm that all items were received
Enable estimating the value of a shipment
How to Print Packing Slips on Shopify
Print packing slips before buying a shipping label
Step 1. Navigate to Orders
When you have already been in your Shopify admin, click on the Orders button to open it.
Step 2. Choose the order
After that, just click on the order that you want to print a packing slip for, you can choose multiple orders at the same time.

Step 3. Click Create shipping label
In case you are using Shopify Shipping, which is created especially for stores based in the United States or Canada, then just click on the Create shipping label button, which is shown in the Unfulfilled section.
Step 4. Click Mark as fulfilled
In case you are not using the Shopify Shipping, choose the Mark as fulfilled button below the products.

Step 5. Choose Print packing slip
Subsequently, just hit a click on the Print packing slip button.
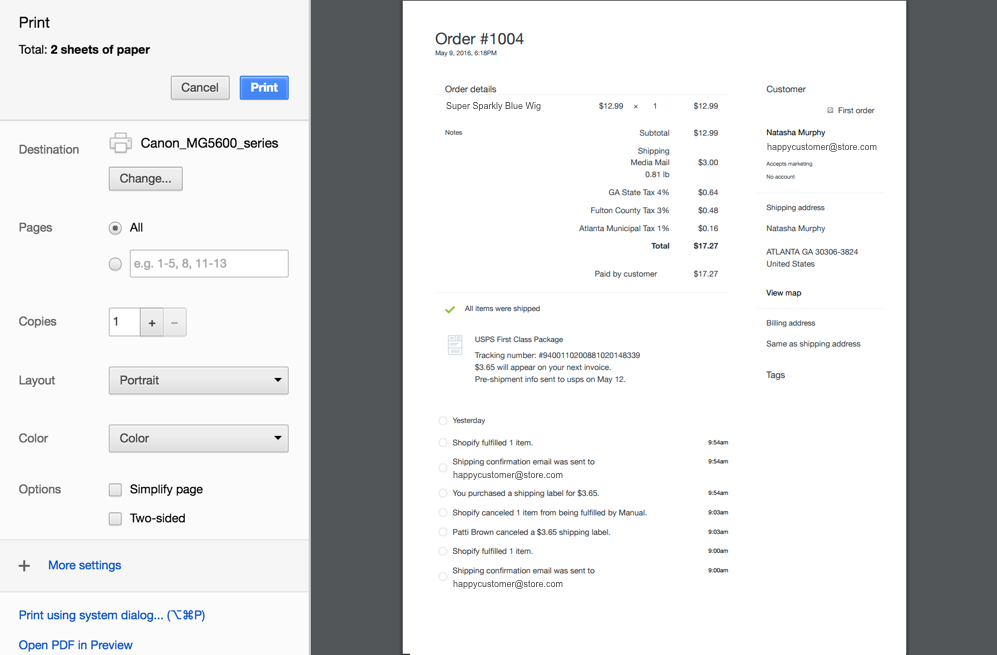
Step 6. Choose to print
Finally, simply click Print to print the Packing Slips.
Print packing slips while buying a shipping label
Step 1. Navigate to Orders
When you have already been in your Shopify admin, click on the Orders button to open it.
Step 2. Select the order
Next, just select on the order that you want to print a packing slip for by clicking it, you can choose multiple orders at the same time.
Step 3. Click Create shipping label
In case you are using Shopify Shipping, which is created especially for stores based in the United States or Canada, then just click on the Create shipping label button, which is shown in the Unfulfilled section.
Step 4. Click Buy shipping label
After that, hit a click on the Buy shipping label option.
Step 5. Select Print packing slip
Choose Print packing slip to finish the next step.
Step 6. Click Print
Finally, click Print to get your packing slips printed.
How to Edit Packing Slips on Shopify
There is a template language called Liquid created by Shopify, which is utilized by your packing slips. If you are the person who can do well with HTML, CSS, and Liquid, then the packing slips variables are what you need to adjust your packing slip template on Shopify.
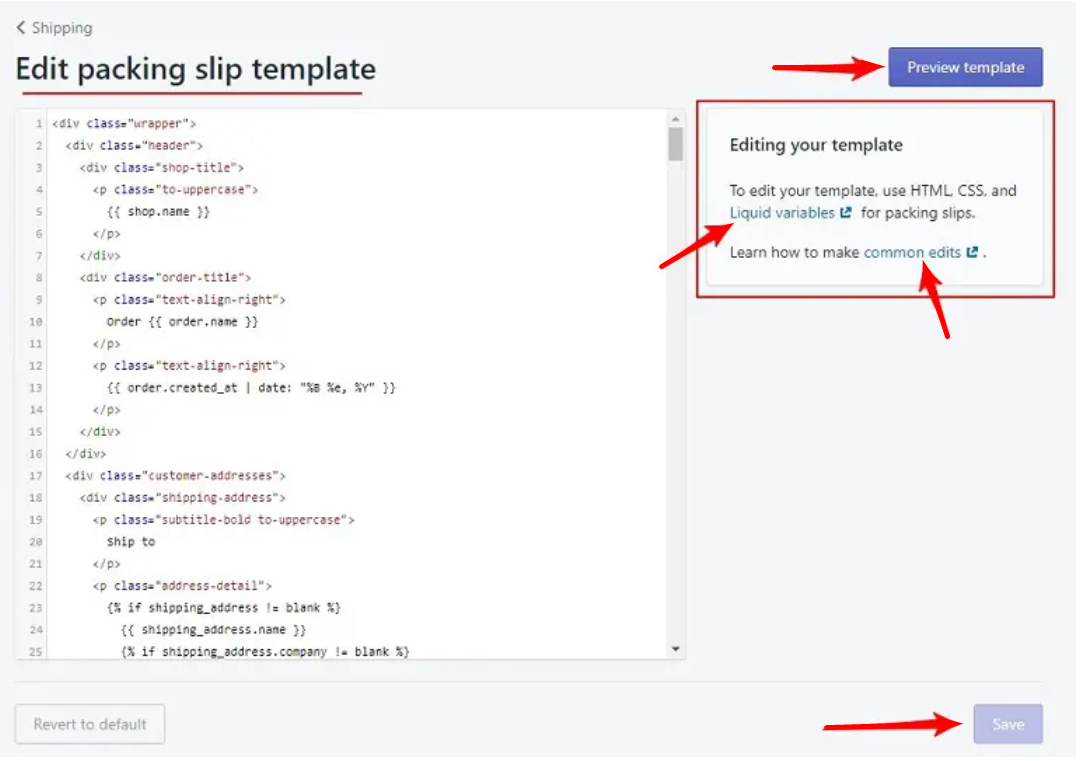
The method is simple, you just need to open the Packing slips section from your shipping settings on Shopify. After that, click the Edit button to adjust the packing slip templates. At the same time, you can just click the Revert to default button to be able to revert the packing slip back to the default template while editing. In case you want to insert the logo to your products or delete the product images from your packing slips or any other customizations, just edit the template code to do so.
The article ends here. Thank you for reading.


Comments
Post a Comment